NOTE: Using our Links are not required but highly recommended.
how to install
FLAT ELASTIC SHOELACES
ROUND ELASTIC SHOELACES
ELASTIC BOOTLACES
ELASTIC COMBAT BOOTLACES
SUGGESTED USE
Our flat laces are designed for a variety of footwear, including casual shoes, athletic sneakers, and high-tops. They provide a secure and comfortable fit with high stretch resistance, adapting to your movements without compromising reliability. Perfect for everyday wear or more active use, they’re ideal for those seeking both functionality and convenience.
Step 1
LACE IT UP
Lace up your shoes as you normally would, in whatever style you prefer.
step 2
CUT TO LENGTH
Put on your shoes to check the tightness of the laces. They should feel snug and secure without slipping out. Test by slipping your shoes on and off a few times to ensure the fit is to your liking. Once satisfied, with the shoe still on, cut the lace ends, leaving about the width of the Flat Link.
NOTE: For added tension when connecting the link, you can trim slightly shorter. Remember that you can always make them shorter, but not longer.
step 3
SINGE THE ENDS
Singe the ends of the laces if desired. While not required, this step helps prevent fraying and improves the overall durability of the laces. If you choose to singe, be sure to do so carefully for a clean, sealed finish.
step 4
LINK INSTALLATION
You can now slide our Flat Link onto the laces. Ensure the lever is fully open, then feed the lace ends into the link. Make sure the laces are seated all the way inside. Hold your fingers close to the link as you feed the laces in—this helps guide them smoothly. Once inserted, clamp the link down securely and give the laces a tug to fully engage the teeth for a firm hold.
step 5
COMING TOGETHER
Bring the two ends of the link together while keeping the lever fully depressed.
step 6
COMPLETION
If followed correctly, you should now have successfully upgraded your shoes with our Flat Elastic Laces, providing a secure and easy fit.
Video installation:
SUGGESTED USE
Our round laces are best suited for casual and athletic shoes, offering a comfortable and secure fit for everyday wear. They’re perfect for sneakers, running shoes, or gym shoes, providing just enough stretch to adapt to your movements without compromising reliability. Ideal for low-impact, everyday use.
NOTE: Using our Links are not required but highly recommended.
Step 1
LACE IT UP
Lace up your shoes as you normally would, in whatever style you prefer.
step 2
KNOT THE END
Separate the Round Link by unscrewing the two ends. Slide each piece onto the laces, one on each side, and move them all the way down to the shoe. Tie your shoes as you normally would, ensuring the tension is exactly how you want it. Slip your shoes on and off a few times to confirm you're satisfied with the fit. Once adjusted, keep your shoes tied and cut the knot as close to it as possible.
step 3
SINGE THE ENDS
Singe the ends of the laces if desired. While not required, this step helps prevent fraying and improves the overall durability of the laces. If you choose to singe, be sure to do so carefully for a clean, sealed finish.
step 4
KNOT IT
Once you have sealed the end, tie a knot as close to the end as possible. This will ensure that our Link will stay securely in place.
step 5
COMING TOGETHER
Once the knots are tied and trimmed, pull them through the Round Link, ensuring they sit securely inside. Screw the two ends of the Round Link together to lock everything in place, completing the installation.
step 6
COMPLETION
If followed correctly, you should now have successfully upgraded your shoes with our Round Elastic Laces, providing a secure and easy fit.
Video installation:
SUGGESTED USE
Our Elastic Bootlaces work with any boot or equivalent footwear.
The Adjustable Link System makes them easy to slip on while having the benefit of adjustable tightness.
NOTE: Using our Link System is not required but highly reccommended.
Step 1
LACE IT UP
Lace up your boots as you normally would, ensuring the ends are evenly aligned.
step 2
SLIDE ON THE ADJUSTER
Slide the adjuster onto the laces, positioning it at your desired tension point for a secure and comfortable fit. Make sure to slip on and off your boot a couple of times to make sure you are satisfied with the feel.
step 3
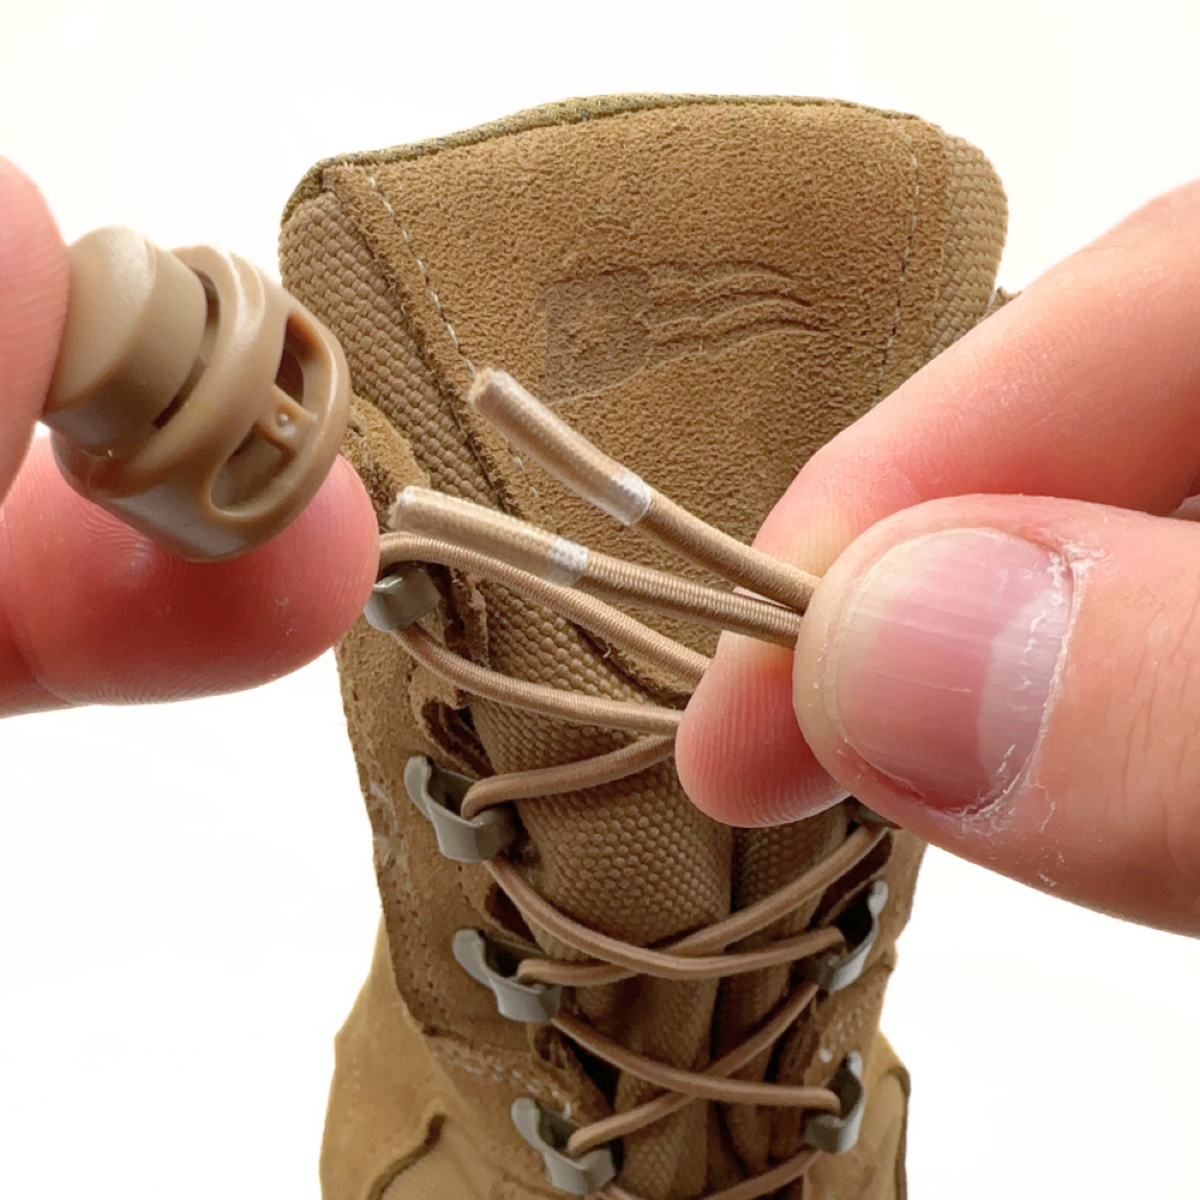
CUT EXCESS OFF
Once you’ve set the adjuster, trim the excess lace to your preferred length, leaving enough for adjustments if needed.
NOTE: The amount you cut off will determine how much lace remains hanging from the adjuster. If you typically blouse or wrap your bootlaces, it’s best to cut little to none for optimal flexibility. You can choose not to use our lace clamp for a more comfortable lace-tucking experience.
step 4
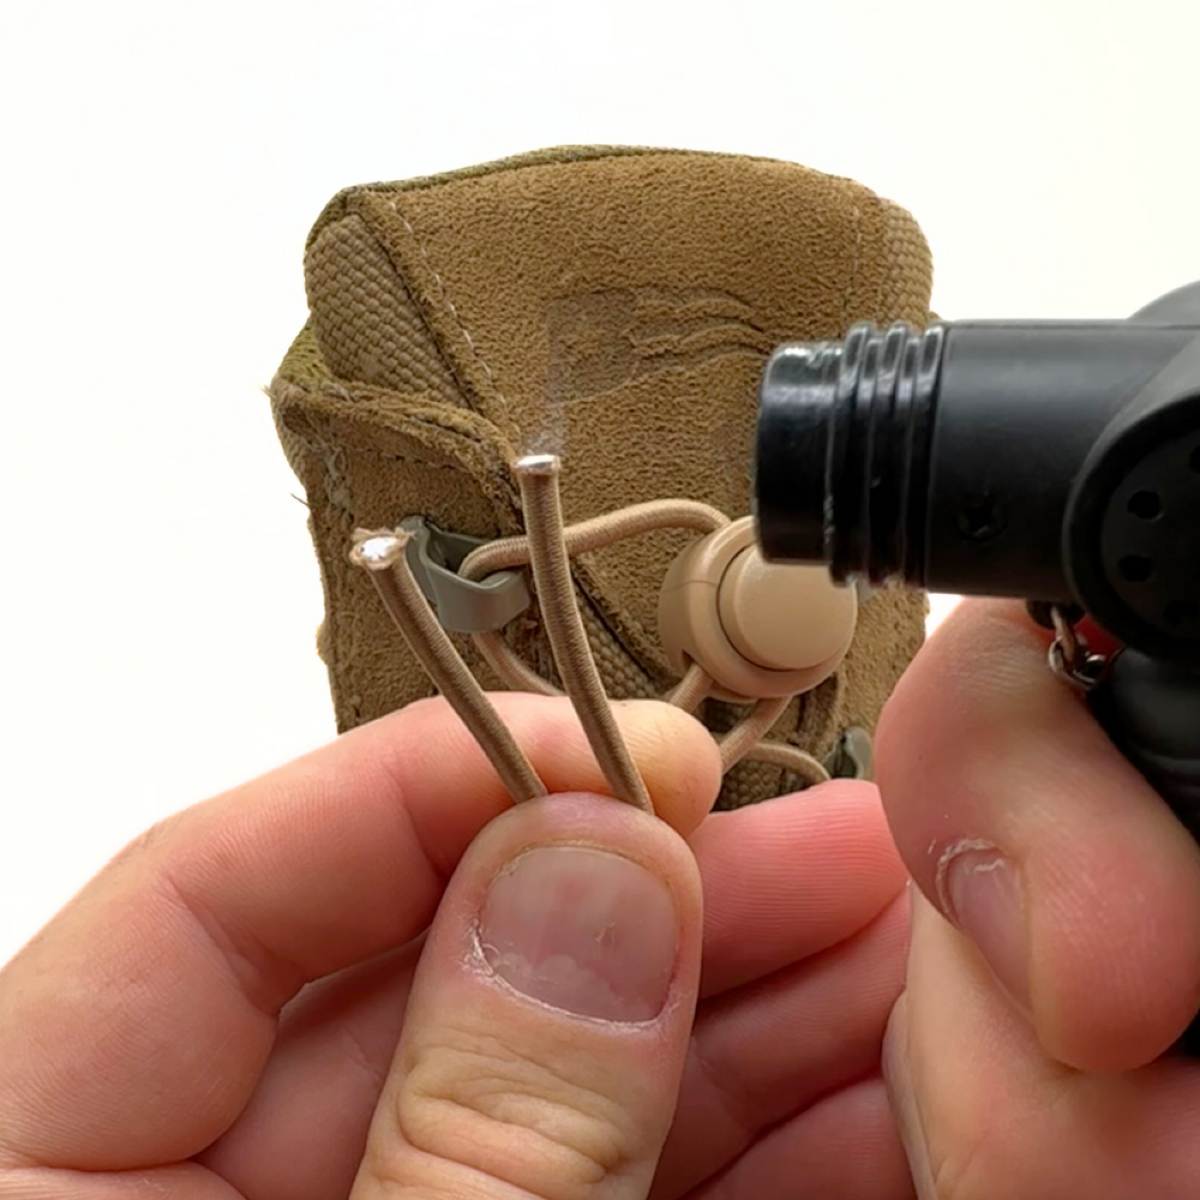
BURN THE ENDS
Torch the ends of the laces after cutting to your desired length. While not required, it’s recommended to prevent fraying and improve durability. A proper singe enhances the grip of our lace clamp for a secure hold.
step 5
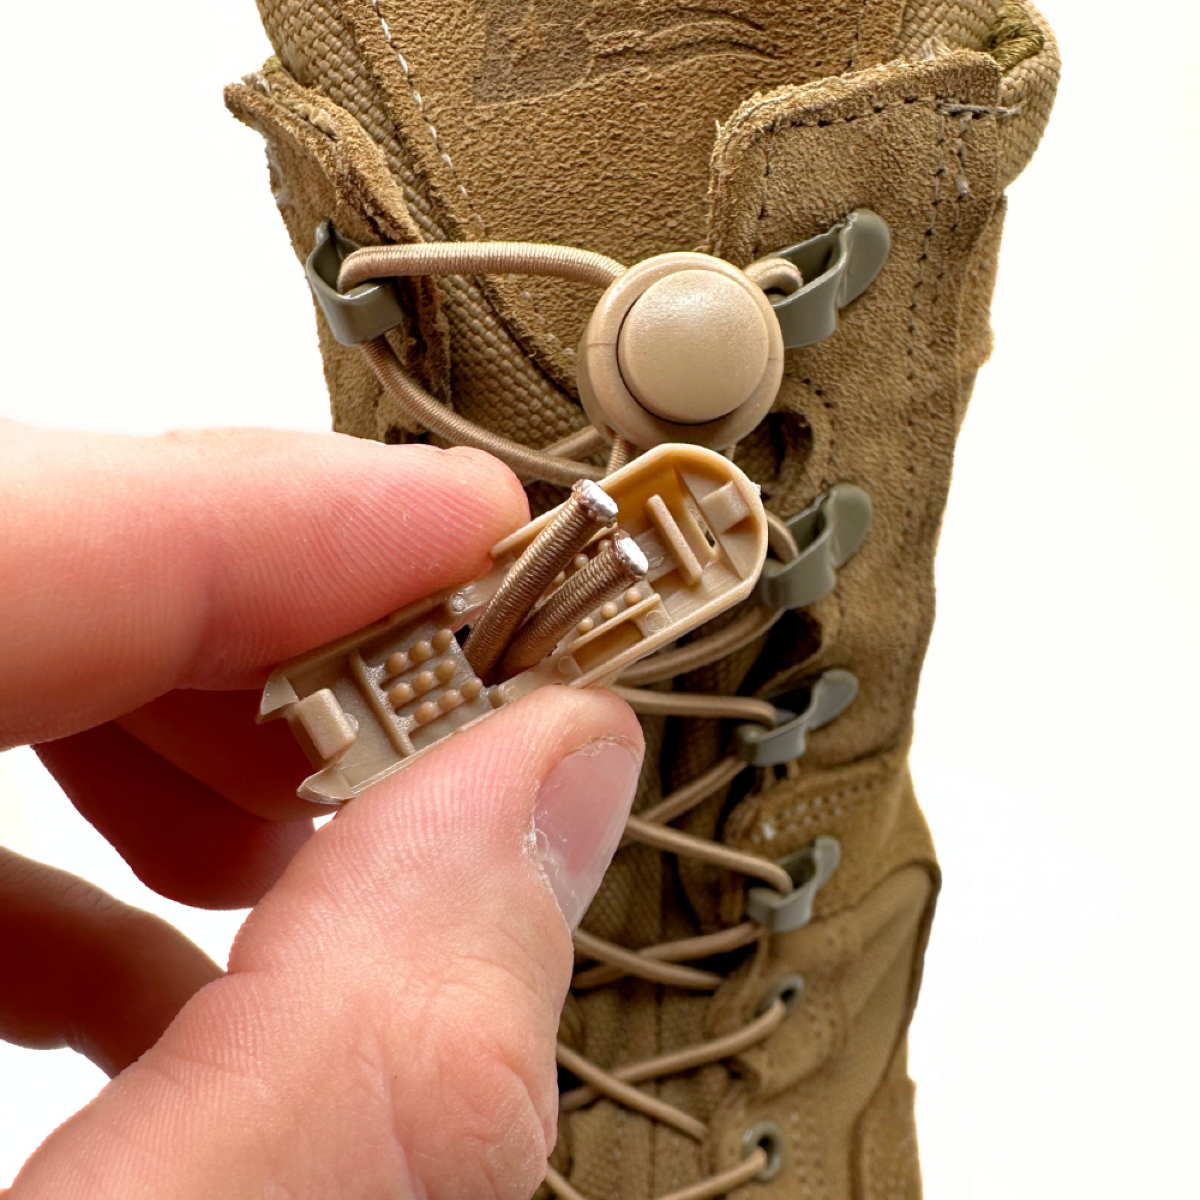
CLAMP ON
Feed the laces through the back of the lace clamp until the ends meet the casted stop. Properly singed ends create a slight bulge, allowing the clamp teeth to grip the laces more securely. Close the clamp until you feel it click into place.
NOTE: Pulling too hard on the clip may cause it to detach. If this happens, use a small pry tool to carefully open the clip and refasten it securely in place.
step 6
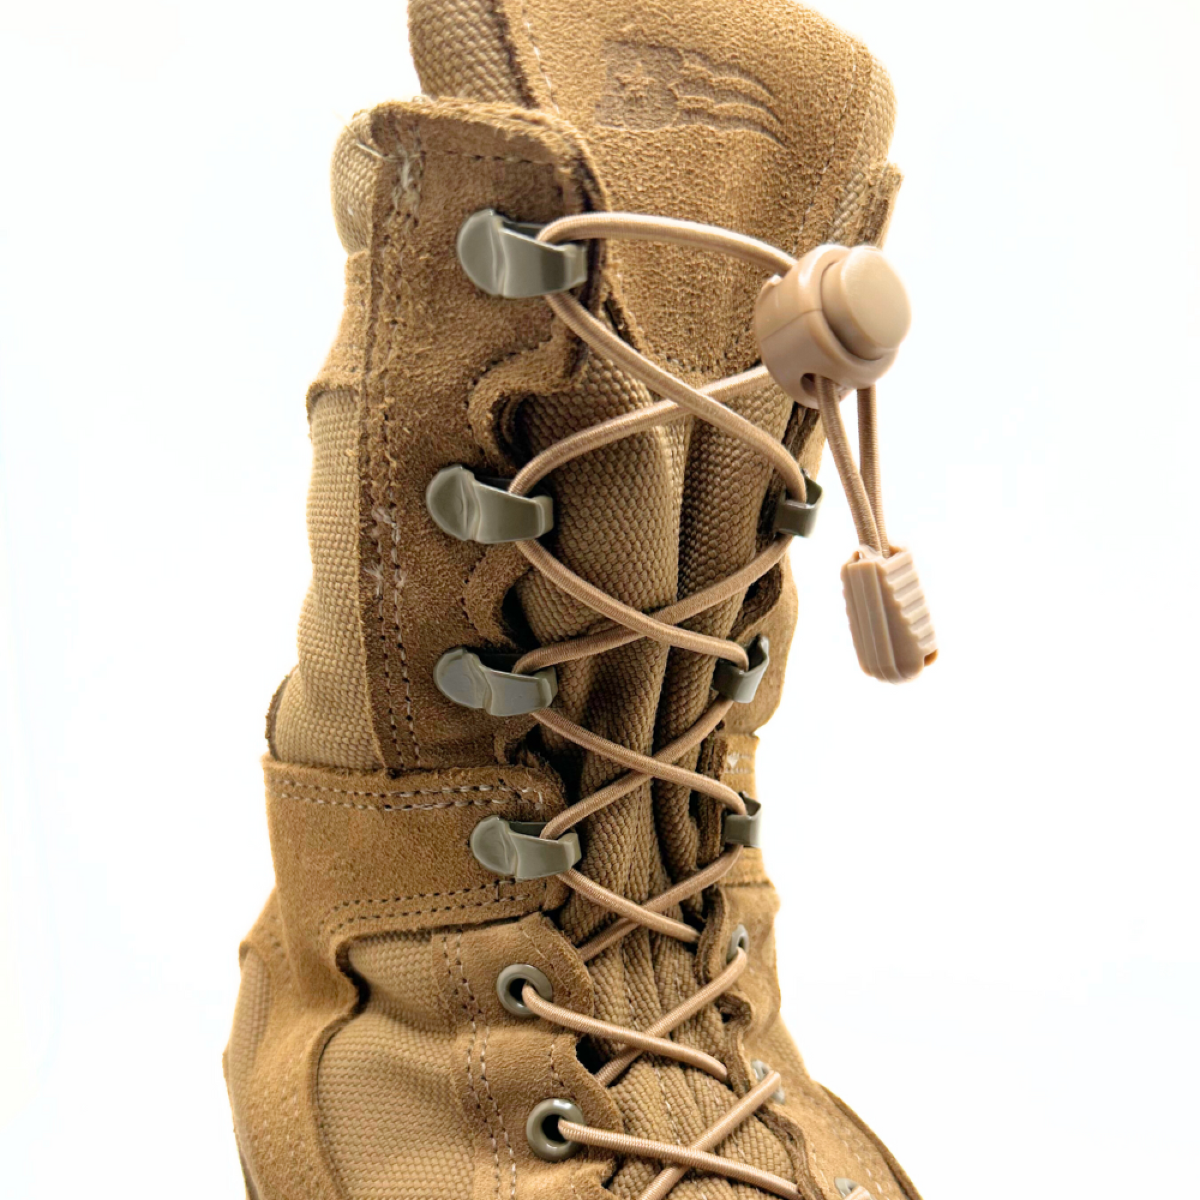
COMPLETION
Following the instructions correctly will result in your boots being officially upgraded with our Elastic Bootlaces. If you have any questions or comments, don’t hesitate to reach out to us at support@lacelinks.com. We’re here to help!
Video installation:
SUGGESTED USE
Our Elastic Combat Bootlaces work with any combat boot or equivalent footwear.
The Adjustable Link System makes them easy to slip on while having the benefit of adjustable tightness.
NOTE: Using our Link System is not required but highly recommended.
Step 1
LACE IT UP
Lace up your boots as you normally would, ensuring the ends are evenly aligned.
step 2
SLIDE ON THE ADJUSTER
Slide the adjuster onto the laces, positioning it at your desired tension point for a secure and comfortable fit. Make sure to slip on and off your boot a couple of times to make sure you are satisfied with the feel.
step 3
CUT EXCESS OFF
Once you’ve set the adjuster, trim the excess lace to your preferred length, leaving enough for adjustments if needed.
NOTE: The amount you cut off will determine how much lace remains hanging from the adjuster. If you typically blouse or wrap your bootlaces, it’s best to cut little to none for optimal flexibility. You can choose not to use our lace clamp for a more comfortable lace-tucking experience.
step 4
BURN THE ENDS
Torch the ends of the laces after cutting to your desired length. While not required, it’s recommended to prevent fraying and improve durability. A proper singe enhances the grip of our lace clamp for a secure hold.
step 5
CLAMP ON
Feed the laces through the back of the lace clamp until the ends meet the casted stop. Properly singed ends create a slight bulge, allowing the clamp teeth to grip the laces more securely. Close the clamp until you feel it click into place.
NOTE: Pulling too hard on the clip may cause it to detach. If this happens, use a small pry tool to carefully open the clip and refasten it securely in place.
step 6
COMPLETION
Following the instructions correctly will result in your boots being officially upgraded with our Elastic Combat Bootlaces. If you have any questions or comments, don’t hesitate to reach out to us at support@lacelinks.com. We’re here to help!


